
I produce my own music and use free plugins constantly. When I do spend money on a plugin it is because it saves significant time or does something specialized nothing else can. Here's what made the cut.
If you read my post on free VST plugins you already know where I stand on the tools versus skill debate. Skill wins. An experienced engineer who understands EQ, compression, dynamics, and signal flow will consistently outperform a less experienced engineer regardless of what either of them is using. That conviction has not changed.
So why do I spend money on plugins at all?
Two reasons. Efficiency and specialization. There are tools that let me accomplish in ten minutes what would otherwise take an hour, not because I could not get there with free tools but because the workflow is so much faster that the time savings genuinely matter across a full production. And there are tools that do something specific and specialized that nothing free replicates convincingly. Those two categories are the only ones that justify spending money in my studio.
I am Tony Oso, a rock and alternative artist, home studio producer, and electrical engineer out of Melbourne, Florida. Here is every paid plugin I use and the specific reason each one earned its place.
Melodyne — Tuning Made Faster and More Musical
Melodyne is the paid tool I reach for most consistently and the reason is pure efficiency. As I have written about before I use pitch correction very lightly in my vocal recordings, moving notes that are 40 or 45 cents off to under 20 cents to add crispness without removing the natural human quality of the performance. I do not use it to fix fundamental pitch problems. I use it to refine performances that are already good.
What Melodyne does that justifies its cost is give me a visual, note-by-note interface for that work that makes the process significantly faster and more musically intuitive than real-time pitch correction plugins. I can see every note, assess its deviation, and make precise adjustments with full control over the correction amount and the speed of the correction. The audio DNA technology it uses analyzes the audio differently than standard pitch correction algorithms and the results sound more natural at equivalent correction amounts.
The time savings across a full album's worth of vocal tracks are real and meaningful. Melodyne does not replace my singing. It refines it. And it does that job faster and more transparently than any alternative I have used.
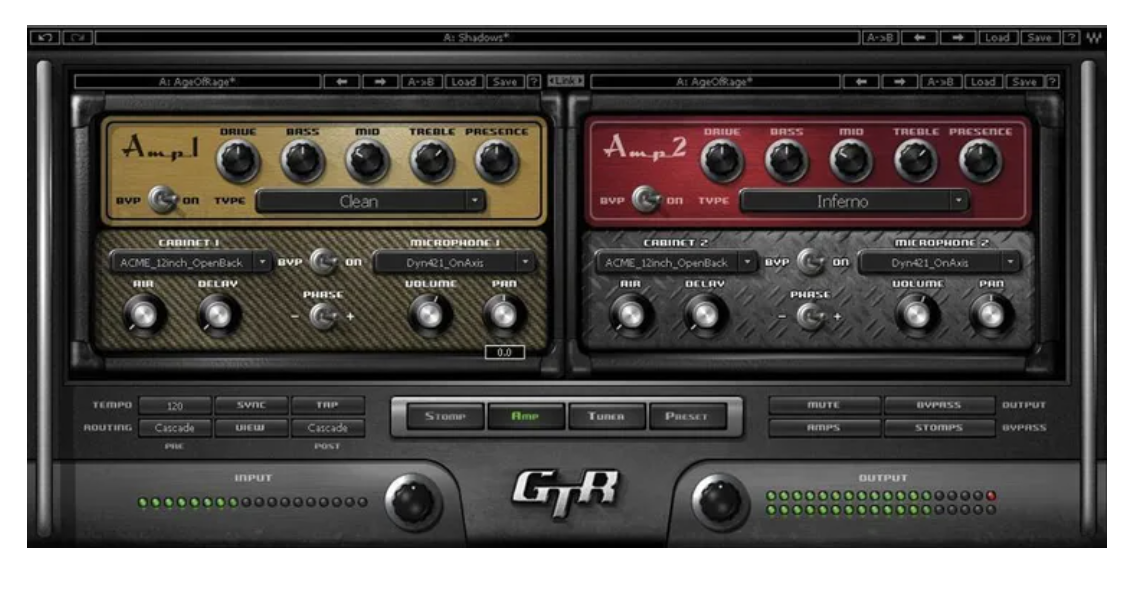
Waves GTR Tool Rack — Every Guitar Sound You Will Ever Need
The Waves GTR Tool Rack is the guitar amp simulation tool that has been in my studio longer than almost anything else and it has stayed because it delivers in a way that free amp sims do not fully replicate.
What makes it worth the money is the completeness of the guitar sound ecosystem it provides. Every clean tone, every crunch, every saturated high-gain distortion, every effect chain I want to build around a guitar part is available inside one plugin with an interface designed specifically for how guitarists think about building tone. Whether I am tracking my Telecaster for something clean and bright or my Gibson Les Paul Studio for something heavier and warmer, GTR Tool Rack gives me a starting point that feels alive in the mix rather than simulated.
The workflow efficiency is the specific thing that justifies the cost. I can move quickly from sound idea to recorded result without spending significant time wrestling with the interface or compensating for limitations in the simulation. When I know exactly what tone a song needs I can build it fast. That speed matters in a home studio where session momentum is everything.
I often combine GTR Tool Rack with Native Instruments Guitar Rig 7 when I want to add experimental textures or effects layers on top of a core amp tone. GTR for the fundamental guitar character, Guitar Rig for the surrounding sonic environment. That combination gives me more range than either tool provides alone.
Waves Tune Real-Time — Vocal Alignment Without the Manual Work
Waves Tune Real-Time handles a specific efficiency problem that comes up constantly in vocal production: keeping pitch correction consistent across a full session without the manual intervention that Melodyne requires for detailed work.
For passes where the vocal performance is strong and I just need basic correction applied reliably across the track, Waves Tune Real-Time does that job quickly and transparently. The real-time processing means I can monitor and adjust during tracking rather than correcting after the fact, which changes how I approach the recording session itself. It simplifies the alignment between what I hear in the headphones and what ends up in the mix.
It is not a replacement for Melodyne on vocals that need detailed attention. It is a different tool for a different part of the workflow, fast and reliable for consistent real-time correction, precise and visual for note-by-note refinement.
FabFilter Pro-Q 4 — When EQ Transparency Actually Matters
I said in the free VST post that stock DAW EQ is sufficient for most work if you understand what you are doing. I stand by that. But there are specific mixing situations where the transparency and dynamic EQ capabilities of Pro-Q 4 produce audibly better results than what I get from stock tools and those situations are common enough in professional-quality mixing that the investment has paid for itself many times over.
The dynamic EQ functionality is the specific capability that separates it from standard parametric EQs. Being able to apply frequency reduction only when a problem frequency is actually active, rather than cutting it statically across the whole track, produces more natural results on complex audio. The inter-channel analysis that lets you see how one track's frequency content relates to another in the mix is a workflow tool that genuinely saves time on dense arrangements.
For mixing and mastering work where I am making the final decisions that determine how a record sounds, Pro-Q 4 is the tool I trust most. The cost reflects the specificity and quality of what it does.
FabFilter Pro-C 3 — Compression With Full Transparency and Control
Everything I said about understanding the mathematics of compression in the free VST post applies here. If you do not understand attack, release, ratio, threshold, and knee behavior, Pro-C 3 will not make you a better mixer. It will give you a more expensive way to make the same decisions.
What Pro-C 3 provides for engineers who do understand those parameters is complete transparency into what the compressor is doing and precise control over every variable. The eight compression styles available within the plugin cover everything from clean transparent compression to program-dependent vintage character to aggressive limiting. The visual feedback is detailed enough that I can see exactly how the compressor is responding to the input signal in real time and make adjustments accordingly.
For vocals and bus compression specifically I reach for Pro-C 3 consistently. The results are cleaner and more controllable than what I get from stock compression at equivalent settings.
Valhalla VintageVerb — Reverb With Real Character
I recommended Valhalla Supermassive in the free VST post for atmospheric and ambient reverb work. VintageVerb is the paid Valhalla product and the reason it is worth paying for is the specific character of the reverb algorithms it provides.
The vintage mode algorithms model specific eras of digital reverb technology from the late 1970s through the 1990s. Those vintage digital reverb units had a specific color and warmth to their decay that modern clean algorithmic reverb does not replicate. When I want reverb that sounds like it belongs on a rock or alternative record rather than reverb that simply sounds technically correct, VintageVerb provides that in a way Supermassive does not.
For the kind of music I make the tonal character of the reverb matters as much as its technical quality. VintageVerb earns its cost because that character is consistently right for the sonic environment I am building.
iZotope Ozone — Mastering With AI-Assisted Reference
Ozone is where I do final mastering work and the reason it justifies its cost is the combination of quality processing and intelligent assistance built into the workflow. The AI mastering assistant analyzes the track and provides a starting point based on reference tracks that I select, which gives me a reasoned beginning rather than starting from flat settings on every master.
I do not use Ozone's suggestions uncritically. I have the technical background to assess what the AI is recommending and to make independent decisions when my ears and the analysis disagree. But the starting point it provides, and the spectral comparison against reference material, saves meaningful time in a mastering session and produces a more consistently professional result than starting from scratch each time.
The Honest Summary
Every paid tool in my setup earns its place by doing one of two things: saving me significant time in a workflow I go through repeatedly, or providing a specific capability or character that free alternatives do not convincingly replicate. Nothing on this list is there because I could not produce good work without it. Everything on this list is there because it lets me produce the same quality of work faster or with more precision.
That distinction matters because it reflects the right way to think about building a studio. Tools should serve your skills, not compensate for their absence. If you are still developing your understanding of EQ, compression, and signal flow, spending money on premium plugins is not going to accelerate that development. Understanding will. The tools become valuable once you know exactly what you are asking them to do.
All of the music I have released was produced with the combination of free tools and these paid tools. The gear is less interesting than what got made with it. If you want to hear the result, my catalog is at tonyosomusic.com/music. Start with Mistakes or Tears and listen to the production choices rather than just the songs. That is where the decisions this post is about actually show up.
Don't sleep on free VSTs. Check out my post on the best free VSTs out there.
If you want to get my take in how AI fits into this, check out my post on using ai in music production.